
Troubleshooting your Singer 301 sewing machine can seem daunting, but with the right guidance, you can master the threading process effortlessly. This guide will provide you with step-by-step instructions to help you avoid common mistakes that can lead to frustrating sewing experiences. By understanding your machine’s mechanics and following our expert tips, you’ll quickly find solutions to any issues you encounter, ensuring that your sewing projects run smoothly. Let’s explore the necessarys to optimize your sewing experience and keep your passion for crafting alive!

Key Takeaways:
- Familiarize yourself with the threading pathway of the Singer 301 to ensure it is properly threaded, as this can prevent common stitching issues.
- Regularly check and clean the machine’s tension settings, as misadjusted tension can lead to a variety of sewing problems, including uneven stitches.
- Pay attention to the needle and thread compatibility; using the wrong needle size or thread type can significantly affect sewing performance and results.
Mastering the Basics: Key Features of the Singer 301
The Singer 301 is a powerful sewing machine that combines classic design with modern efficiency. Understanding its key features helps you make the best use of your sewing experience.
- Lightweight Design: Weighs only 15 pounds, making it portable.
- Free Arm: Allows easy maneuvering for cuffs and collars.
- Adjustable Stitch Length: Customize stitches between 6 to 26 stitches per inch.
- Built-in Stretch Stitches: Perfect for sewing knits without puckering.
- Heavy-duty Metal Frame: Provides durability and stability during use.
Assume that by mastering these features, you can elevate your sewing skills and tackle a variety of projects with greater ease.
Essential Components and Their Functions
The Singer 301 consists of several necessary components, each serving a distinct function to facilitate your sewing tasks. The needle pierces the fabric to create stitches, while the presser foot holds the fabric in place as you sew. The bobbin stores the lower thread, which works in conjunction with the upper thread to form stitches. Additionally, the handwheel allows you to manually raise or lower the needle, and the stitch selector lets you choose different stitch types tailored to your projects.
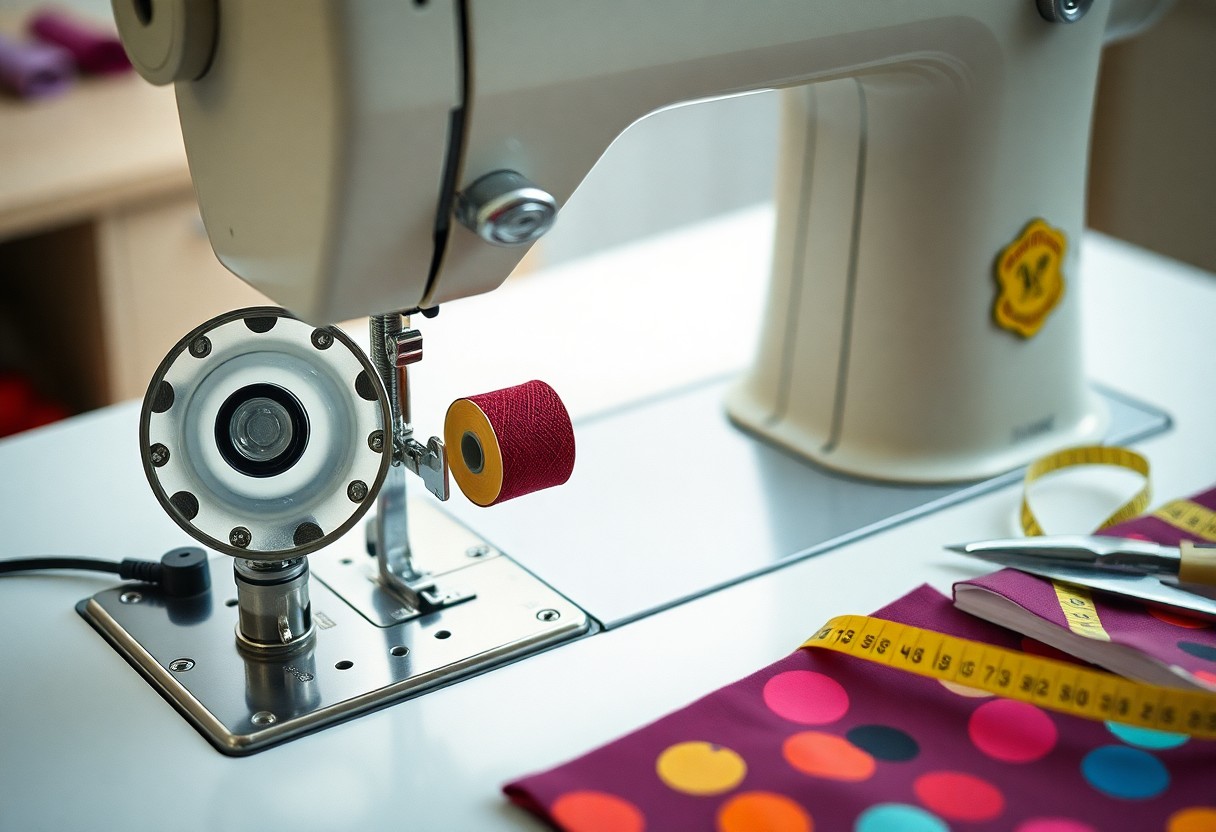
Understanding the Threading Path
The threading path on the Singer 301 is integral for creating smooth, consistent stitches. Following the path properly ensures your machine operates efficiently without tangling or breaking the thread.
Understanding the threading path is key to successful sewing. Start by placing your spool on the spool pin and threading through the tension disc, which regulates thread tension. From there, follow the designated guides through the machine, making sure the thread is snugly placed in each notch and around any tension discs. Be mindful of the threading order, as incorrect sequences can lead to complications, such as skipped stitches or thread jams. By ensuring you master this path, you set the stage for a smooth sewing experience.
Diagnosing Threading Problems: Common Issues
Identifying threading problems on your Singer 301 requires a keen eye for detail. Issues like uneven stitches, thread tangles, and skipped stitches can be indicators of poor threading. Sometimes, simply re-threading your machine, following the threading diagram closely, can resolve these common issues. Look for signs of wear on your thread and check if the thread is suitable for the type of fabric you are using, as the wrong combination can lead to frustrating sewing experiences.
Tension Troubles: Recognizing and Resolving Imbalances
Mismatched tension can cause a myriad of sewing headaches, including puckering and loose stitches. Adjust the tension dial on your Singer 301 to achieve the perfect balance, ensuring the upper and lower threads interlock properly. Test your settings on scrap fabric until you find a consistent, smooth stitch that meets your needs.
Thread Breakages: Identifying Root Causes
When your thread snaps mid-project, it can disrupt your flow and lead to frustration. Breakages can stem from several sources, such as incorrect threading, a dull needle, or even incompatible thread types. Each of these factors can weaken the thread, leading to frequent interruptions in your sewing.
Diving deeper into thread breakages, one might notice that using thick or abrasive fabrics can exacerbate the situation. A needle that is not appropriately sized for your selected thread can also create excessive friction, resulting in breaks. For instance, using a fine needle with heavy-duty thread could lead to frequent snapping, as the needle struggles to maneuver through thicker materials. Regular maintenance checks on your machine, including cleaning and oiling, can mitigate some of these risks, ensuring a smoother sewing experience with less hassle.
Step-by-Step Threading Tutorial: From Empty Bobbin to Ready-to-Sew
| Step | Instructions |
| 1 | Load your spool of thread on the spindle. |
| 2 | Wind the bobbin with precision. |
| 3 | Thread the upper mechanism correctly. |
| 4 | Insert the bobbin into the case. |
| 5 | Final adjustments and test stitching. |
Wind the Bobbin with Precision
Before you can start sewing, winding the bobbin accurately is key. Place the thread spool onto the spindle and pull the thread through the thread guide. Ensure the thread is wrapped around the bobbin winder tension disk, then push the bobbin winder lever to the right to engage the winding mechanism. Allow the bobbin to wind evenly without excessive speed to prevent tangling.
Threading the Upper Mechanism Correctly
Threading the upper mechanism of your Singer 301 involves a series of steps designed for smooth operation. Start by raising the needle to its highest position. Then, pull the thread down through the guide on the top of the machine, wrapping it around the tension disc and feeding it through the take-up lever. Carefully guide the thread down through the needle bar guide and into the needle. Ensure each section is securely positioned, allowing for optimal tension during sewing.
Following the threading path illustrated in your machine’s manual will help. As you thread, make sure the thread is snug but not overly tight. The tension on the thread is vital for the consistency of your stitches. Any misalignment can lead to skipped stitches or bunching. After threading, remember to test with a scrap piece of fabric to confirm adjustments, ensuring smooth operation before committing to your project.
Advanced Tips for Flawless Operation
Achieving impeccable stitching on your Singer 301 requires a few advanced strategies. Ensuring that your machine operates smoothly not only enhances your sewing experience but also prolongs the life of your sewing machine. Consider these necessary tips:
- Use matching needle size for different fabrics.
- Check tension settings regularly.
- Experiment with various thread types.
- Clean lint around the bobbin area frequently.
- Keep your machine lubricated as per the manual’s guidance.
Needle and Thread Compatibility
The Role of Needle and Thread Compatibility
Selecting the right needle and thread is fundamental to achieving flawless stitches. Each fabric type has a corresponding needle size and thread weight that optimizes performance. Ensure that your chosen thread is strong enough to hold your seams, while the needle should be appropriate for the fabric’s weight to prevent damage.
Maintaining Your Machine for Optimal Performance
Routine maintenance is key to keeping your Singer 301 in prime condition, ensuring long-lasting performance. Cleaning, oiling, and regularly checking for wear and tear are vital steps. A well-maintained machine not only sews better but can also save you money on repairs and replacements down the line.
Regularly checking the needle and thread compatibility with your fabric can save time and frustration. Clear away lint and threads after every major project as they can accumulate and affect performance. Replacing needles after several sewing sessions also prevents the risk of them becoming blunt, which can lead to skipped stitches and uneven seams. Consistently following a maintenance schedule will ensure your Singer 301 stays in top-notch condition, enabling endless creative possibilities!
Troubleshooting Checklist: Quick Fixes for Common Errors
Refer to this checklist to address frequent issues faced while threading your Singer 301. Verify that the upper thread is correctly threaded through the tension discs and that the bobbin is seated in its case properly. Double-check that your needle is correctly installed and not damaged. If you encounter thread breaks or skipped stitches, re-evaluate your thread quality and tension settings. These quick checks can frequently pinpoint the root of the problem and eliminate unnecessary frustration.
Define the Problem: Flowchart of Threading Errors
A flowchart can streamline your troubleshooting process by visually mapping the most common threading errors. Start by identifying symptoms like tangled threads, skipped stitches, or excessive noise. From there, follow branches that lead to potential causes such as improper threading, worn components, or tension discrepancies, leading you directly to corrective actions tailored to your specific situation.
Immediate Solutions and Next Steps
Upon identifying the issue through your flowchart, implement the recommended solutions immediately. If threading mistakes are the cause, simply re-thread the machine, ensuring proper tension settings. For issues related to the needle, replace it if it appears bent or dull. If re-threading doesn’t resolve the problem, consult your machine manual for specific instruction on recalibrating tension or replacing parts. Document any recurring issues to better inform your next steps, or to share with a professional if required.
Being proactive in addressing problems is key. After implementing fixes, test the machine on scrap fabric to ensure it functions smoothly before returning to your main project. This not only saves you time but also helps prevent extensive damage to your work. If problems persist after applying the troubleshooting techniques, consider reaching out to a qualified technician for a more in-depth examination. Keeping thorough notes of the errors you encounter will also be instrumental in refining your troubleshooting skills and enhancing your sewing experience with the Singer 301.
Summing up
With these considerations, you can navigate the ins and outs of threading your Singer 301 sewing machine with confidence. By understanding each component and following the troubleshooting steps outlined in this guide, you can ensure smooth operation and optimal performance. Whether you’re a beginner or an experienced sewer, these tips will help you avoid common pitfalls and keep your projects on track. Trust in your abilities, and enjoy the creative possibilities that your Singer 301 has to offer.
FAQ
Q: What are some common threading issues I might encounter with my Singer 301 sewing machine?
A: One common issue is the thread breaking, which can occur due to improper tension settings or using the wrong type of thread. Another frequent problem is the thread getting jammed, often caused by debris or lint buildup in the machine. Finally, you might experience skipped stitches, typically a result of the needle being unaligned or worn out. Regular maintenance and proper threading techniques can help mitigate these issues.
Q: How can I properly thread my Singer 301 sewing machine to avoid problems?
A: To properly thread your Singer 301, start by raising the presser foot before threading the upper thread. This allows the thread to pass through the tension discs smoothly. Follow the threading path indicated on the machine, making sure the thread is securely in place in each guide. After threading the needle, pull a few inches of thread through to ensure it feeds correctly. Lastly, make sure to lower the presser foot and check that the bobbin is also threaded correctly, as an incorrectly wound bobbin can lead to various issues.
Q: What should I do if I continue to experience problems despite following the troubleshooting guide?
A: If you continue to experience problems even after following the troubleshooting guide, check for any signs of wear or damage on the needle, thread, and bobbin. Also, inspect the machine for any debris or lint that may have accumulated in the threading paths or bobbin area. If the issues persist, consult the user manual for specific settings or adjustments or consider reaching out to a professional technician who specializes in sewing machines for further assistance. Regular maintenance can help prevent ongoing issues as well.